In this series of posts I’m gonna show you how to install PHP Frameworks such as “Laravel 4.2“, “Yii 2“, and “Zend Framework” on windows 8.1.
Prerequisites: Make sure you have already installed latest WAMP Server. If you still haven’t installed WAMP server, don’t worry just read my post Installing PHP/MySQL on Windows 8.1 Using WAMP Server Step by Step.
Note: Installation process of many PHP Frameworks consists of the follwoing two parts:
- Part 1 – Instilling Composer
- Part 2 – Installing the XYZ Framework
Part 1: Installing Composer
In this post you’ll learn where to get from and how to install Composer. Just follow these 7 simple steps and you’ll get installed Composer in the end.
Step 1:
To directly download Composer-Setup.exe, click Download Composer Automatically. You can also download Composer manually by visiting www.getcomposer.org/…/installation-windows.
Step 2:
After downloading, double click the Composer-Setup.exe and you’ll see Composer Setup window as shown below:
 Click “Next >” to proceed the installation process further:
Step 3:
 Select “Install Shell Menus” option and click “Next >“. This option makes sure that after installation gets completed, you can run the composer anywhere just by right clicking and selecting the option “Composer Install“.
Step 4:
 Click “Browse…” and select the folder where your “php.exe” file exist. If you are not sure where to find it, don’t worry, just follow these given instructions.
- Click “Browse…” and you’ll see the windows ‘Open Dialog Box‘.
- Open the drive where you’ve installed WAMP Server.
- Open ‘wamp’ folder and look for the ‘bin‘ folder.
- Open ‘bin‘ folder and look for the ‘php‘ folder.
- Open ‘php5.5.12‘ folder and look for the ‘php.exe‘ file.
- Click ‘php.exe‘ file and then press the ‘Open‘ button.
After all that, click “Next >“.
Step 5:
 Click “Install” to install Composer.
Step 6:
 You are being informed that the path variable has been changed, Log off and Log in again.
Step 7:
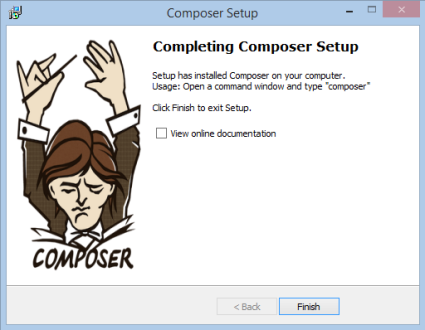
 Click “Finish” to complete the installation set up.
Congrats! You’ve successfully installed Composer and have completed Part 1.
Now you need to Complete Part 2 to install your desired PHP MVC Framework from any of the following:
- Installing Yii2 in 3 Steps
- Installing Laravel 4.2 in 5 Steps
- Installing Zend Framework 2


i hv an error after installing composer is
[ERROR] It seems that HTML2PDF dependencies are not installed… you must install thems with `composer install`
i need to convert html page to pdf in yii framework… it gives this error. pls can u help me out for this
LikeLike
I’m not sure what you are trying to do but it seems that you didn’t install the dependencies required to work. I would suggest you to run the
"composer install"in the directory where your"composer.json"file exists for your project you are working on.LikeLike
i hv installed composer as u suggested above .. btu then also it gives this error…
[ERROR] It seems that HTML2PDF dependencies are not installed… you must install thems with `composer install`
LikeLike
You have installed composer which doesn’t mean you’ve installed your required pacakeges/libraries.
To install your HTML2PDF package you’ll have to do the following:
This will install your package and will not throw error when you’ll use it.
LikeLike
thanks for your reply !!!!!!
Can u pls tell me that can i use composer in yii 1.1 framwork.. if yes.. then give the steps or links. i ‘m trying this .. i can’t able to do this…
LikeLike
Well first of all you’ll have to understand that why we use composer.
There are some packages build by someone else and they allow others to use. These packages are maintained as collection https://packagist.org/.
Browse this site and find your desired package. There you’ll also see how to require that package in your project, usually by running “composer require packageName”. For example if I want to use “Carbon” package in my project and I don’t know how to require it in my project then I’ll go to https://packagist.org/ and will search for “Carbon”, Clcik Link name “nesbot/carbon” to see the detail of the Carbon packge and you’ll see there that you can require Carbon package into your porject by running “composer require nesbot/carbon”
Hope this will help you.
LikeLike