Installing WordPress on Ubuntu is a bit more different than installing it on Windows. So this post will teach you how to install WordPress on your Ubuntu machine.
Step 1: Installing LAMP
First of all you need to set up LAMP on your Ubuntu machine. If you have not installed LAMP please install it. Read my blog Installing LAMP Stack on Ubuntu and Debian in Just 3 Steps to install LAMP and proceed with the further steps.
Step 2: Downloading WordPress
There are two methods to download WordPress:
- Via Downloading tar file (recommended)
- Prompt to your home by running command 1
- Run the command 2 in your terminal to download the tar file in your home directory.
- Run the command 3 to extract the wordpress directory in your home directory.
1. cd ~/
2. wget http://wordpress.org/latest.tar.gz
3. tar xzvf latest.tar.gz
- Via downloading zip file from wodpress.org
- Download the zip file
- Extract the downloaded zip file to your home directory
You should have a wordpress named directory in your home directory (or where you prompted when downloading the zip file and extracted it.)
Step 3: Install php5-gd and libssh2-php
PHP has the capability to extend the language by installing different extension modules according to your needs and requirements. In this step we’ll install two PHP extension modules name gd and libssh2-php.
sudo apt-get update
sudo apt-get install php5-gd libssh2-php
If you further want to learn about installing and learning about some PHP Extension Modules then read my blog Understanding Root Directory, Testing PHP Engine and Installing PHP Extensions on Ubuntu
Step 4: Creating Database
Open your terminal and run the following commands one by one:
1. mysql -u root -p
2. CREATE DATABASE wordpress;
3. quit
- Enters into MySQL CLI and your prompt will look like this: mysql>
- Create a new database named wordpress
- Exits from the MySQL CLI
Step 5: Configuring WordPress
Note: for this section I suppose your wordpress directory is in your home directory.
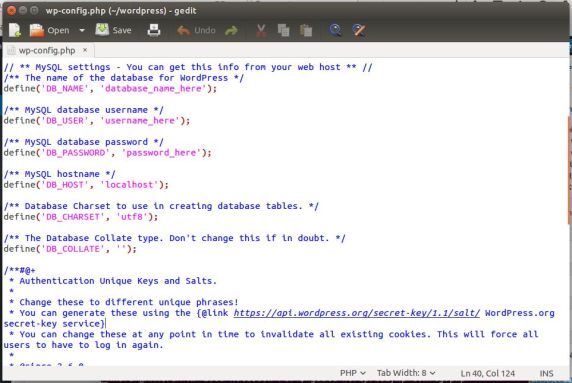
Our wordpress directory contains a file named wp-config-sample.php. Save it as wp-config.php and open it in gedit. Run the following command to do so.
1. cp wordpress/wp-config-sample.php wordpress/wp-config.php
2. gedit wordpress/wp-config.php
- saves wp-config-sample.php as wp-config.php
- Opens wp-config.php in gedit like shown below
 Do the following configurations:
1. define('DB_NAME', 'wordpress');
2. define('DB_PASSWORD', 'yourpassword');
On your localhost you would not like to be asked for the FTP Server related information when installing themes and plug-ins. To avoid this and directly download the plug-ins and themes include the following snippet of code in the ‘wp-config.php’ as shown underlined in the picture below:
define('FS_METHOD', 'direct');
Step 6: Copying ‘wordpress’ to Root Directory
Our database and configuration file is ready, now it’s time to copy our wordpress directory to the our root directory to browse the wordpress site on our localhost. Run the following command to copy wordpress directory to the root directory:
sudo rsync -avP wordpress/ /var/www/html/wordpress/
Now, we need to change the permission of the ‘wordpress‘ directory. Prompt to the wordpress directory in the root directory we just copied and run the following command:
sudo chown -R username:www-data *
This command will assign the control of our wordpress directory to www-data user. This is a user web servers used to access the files. In this way the server would be able to write directly to our wordpress directory.
Step 7: Creating ‘Uploads’ Directory
We need to create a directory named uploads inside wp-content directory to hold our uploaded files such as images, videos and etc. Run the following command to do so:
sudo mkdir wp-content/uploads
Our uploads directory needs to change the permission so that the web server itself could write to this directory:
sudo chown-R :www-data wp-content/uploads
Now our web server would be able to write in this directory.
Step 8: Configuring by Web GUI of WordPress
Now we ready to browse our wordpress’ web interface to do a bit more configuration and log into it. Type http://localhost/wordpress and you’ll see the following page:
Fill the required information in the form as shown above and click Install WordPress button. You’ll be asked to log in with a Success Message as show below:
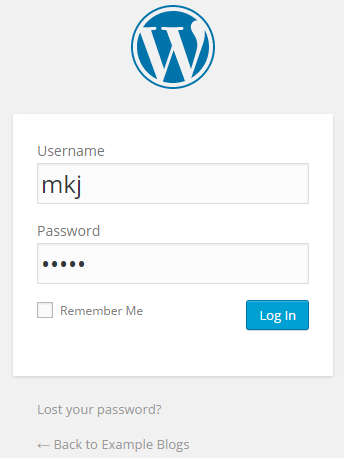
 Click log in you’ll seen the following log in screen:
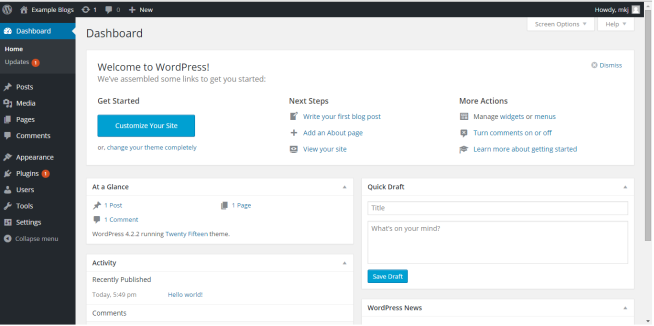
 Enter your log in information and click Log In, wordpress dashboard will be shown as displayed below:
You’ve successfully installed WordPress on your Ubuntu machine. You can start your work immediately but if you are not happy with the default WordPress URL style and want to change then you need to do a bit more configuration. To learn about it read my blog Configuring the Permalinks in WordPress on Ubuntu.


so i got to step 7 and entered the mkdir line and it says “no such file or directory”
I havent been using linux long, so i apologize if i just missed something easy
LikeLike
I think you are missing ‘sudo’ in your commands to make directory. As you don’t have permissions to write in /var/www/ directory. Only ‘sudo’ user can write in this directory.
Use ‘sudo’ as described in step 7. Hope this would solve your problem.
LikeLike
Can you please explain the second part of step 6. It says invalid user. What do i have to enter in the username part of it, and you said -Prompt to the wordpress directory in the root directory…- but in the root directory there is only a Desktop directory. I thank you in advance for your time.
LikeLike
Hi Luan,
Root directory here refers to the root directory for Apache user which can be ‘/var/www/html/’ or /var/www/’ (you can read more about the Root Directory here and it’s not about the root directory of your Ubuntu OS.
Now come to the username problem. There is an Apache user who need the permission to write in your root directory. This user need to have access to write data in your “wordpress” directory. The name of the user Apache use here on Ubuntu is “www-data”. So you’ll just type the command as it is as given in the example and run hit enter.
Hope this will sort out your problem. Feel free to ask if you stuck somewhere else in this post.
LikeLike
You explained it perfectly in the main tutorial. It was a problem at my end, specifically, not knowing the correct username (Since it is not my machine). I am thankful for your help.
LikeLike
sudo chown -R username:www-data *
This command is telling me invalid username what is the problem.
LikeLike
You probably would be using the ‘username’ as your username, but you should provide your own username. You can use `whoami` command in your terminal to know your username.
LikeLike